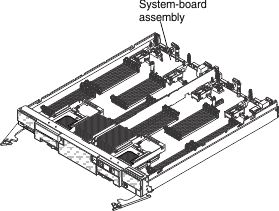
Use this information to install the system-board components as part of the procedure to replace the base assembly.
- This procedure should be performed only by trained service technicians.
- The base assembly includes the chassis and system board.
Before you install the system-board components, complete the
following steps:
- Read Safety and Installation guidelines.
- If the compute node is installed in a Lenovo Flex System chassis, remove it (see Removing a compute node from a chassis for instructions).
- Carefully lay the compute node on a flat, static-protective surface, orienting the compute node with the bezel pointing toward you.
- Obtain the following items for use during the replacement procedure
(see Parts listing, Types 7196 and 4258):
- Alcohol wipes
- Bezel
- Thermal grease
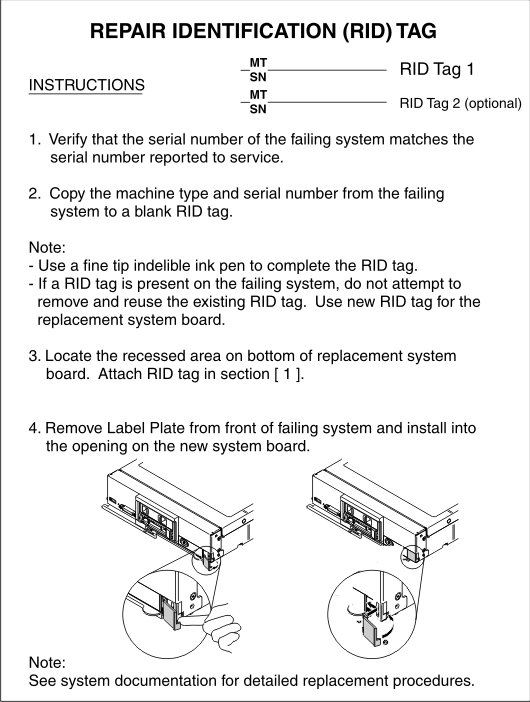
Important: When you replace the base assembly,
you must update the compute node with the latest firmware or restore
the preexisting firmware. Make sure that you have the latest firmware
or a copy of the preexisting firmware before you proceed. See Updating firmware and device drivers for more information.
To install the components on the system-board assembly, complete the following steps.
- Install the left- and right-bezels (see Installing the bezel).
After you install the components on the system board of the
new base assembly, complete the following steps:
- Install the cover onto the compute node (see Installing the compute node cover for instructions).
- Install the compute node into the chassis (see Installing a compute node in a chassis for instructions).
- Update the Universal Unique Identifier (UUID). Use the Advanced Settings Utility to update the UUID in the UEFI-based compute node (see Updating the Universally Unique Identifier and DMI/SMBIOS data).
- Update the compute node with the latest firmware or restore the preexisting firmware that the customer provides (see Updating firmware and device drivers for more information).