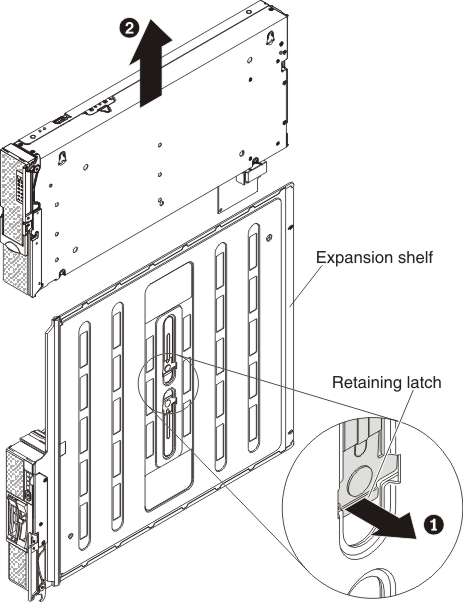
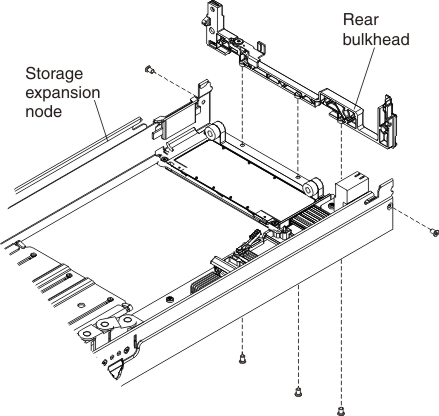
Use these instructions to remove the rear bulkhead from the storage expansion node.
Before you remove the rear bulkhead, complete the following steps:
- Read Safety and Installation guidelines.
- If the storage expansion node assembly is installed in an Flex System Enterprise Chassis, remove it (see Removing the storage expansion node from the expansion shelf for instructions).
- Carefully lay the storage expansion node assembly on a flat, static-protective surface.
To remove the rear bulkhead, complete the following steps:
If you are instructed to return the rear bulkhead, follow all packaging instructions, and use any packaging materials for shipping that are supplied to you.
Continue to Replacing the rear bulkhead.

