Check to ensure that all of your hardware components are present and functioning properly.
Make sure that the following LEDs on the front of the system
are lit:
For more information about identifying your system's components,
see the Overview section for your offering.
- The logo on the chassis front information panel.
- The power LED on the Flex System Manager management node
- The power LED on each compute node flashes slowly to indicate that the compute node is connected to power and is ready to be turned on.
- The power LED on the top of rack switch (if applicable).
- The dc power and ac power LEDs on each power supply.
- The power LED on each I/O module.
Cable a system to the Chassis Management Module (CMM) to
perform a verification check, and access your Storwize V7000 to ensure
that it is functioning.
- Perform a chassis installation verification check.
- Install the BNT SFP (RJ45) transceiver (B in Figure 1). This SFP transceiver is included in the ship group. Install the transceiver in I/O module slot 1, port 6 on the chassis.
- Connect a device that has browser access and an Ethernet port
to the transceiver on I/O module slot 1, port 6 (A in Figure 1).
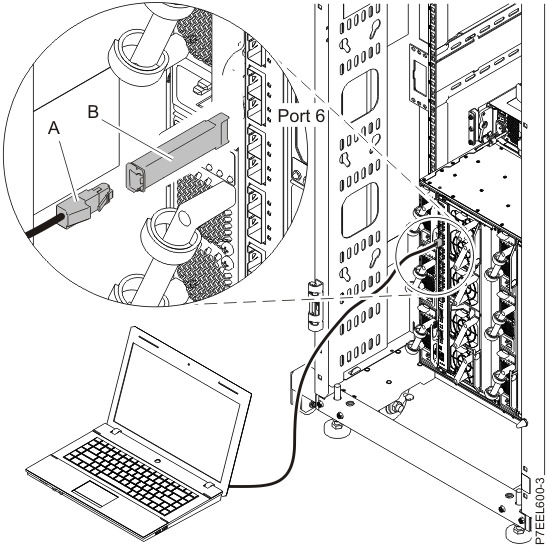 Figure 1. Connecting to port 6 on the chassis I/O module
 - On your device, open a browser window.
- Ensure that your device is set to IP address 192.168.93.5, subnet mask 255.255.255.0, and gateway 192.168.93.217.
- In the address field, type https://192.168.93.100.Note: Ensure that you type https://. The s means that you will be using the Secure Sockets Layer (SSL) when you communicate with the CMM.
- Accept any security exceptions to continue.
- In the Chassis Management Module sign-in window, type the user name and password. The user name is USERID and the password is PASSW0RD.
- Click Log In. Create a new password. The new password is Passw0rd.
- Cancel out of the Initial Setup Wizard.
- Click System Status.
- Hover over each component on the System Status - Chassis tab to ensure that it is functioning properly.Note: If you identify a component that is in the Error state, contact your service provider.
- Click the Events tab and ensure that there are no errors.
- Verify that your Storwize V7000 storage
is functioning.
Note: Your Storwize V7000 storage is preconfigured.
- Connect your device to port 1 on the Storwize V7000 upper controller.
- Open a different browser window, and type https://192.168.93.213/service. Accept any security exceptions to continue.
- In the Storwize V7000 Service
Assistant Tool, type passw0rd for the password.
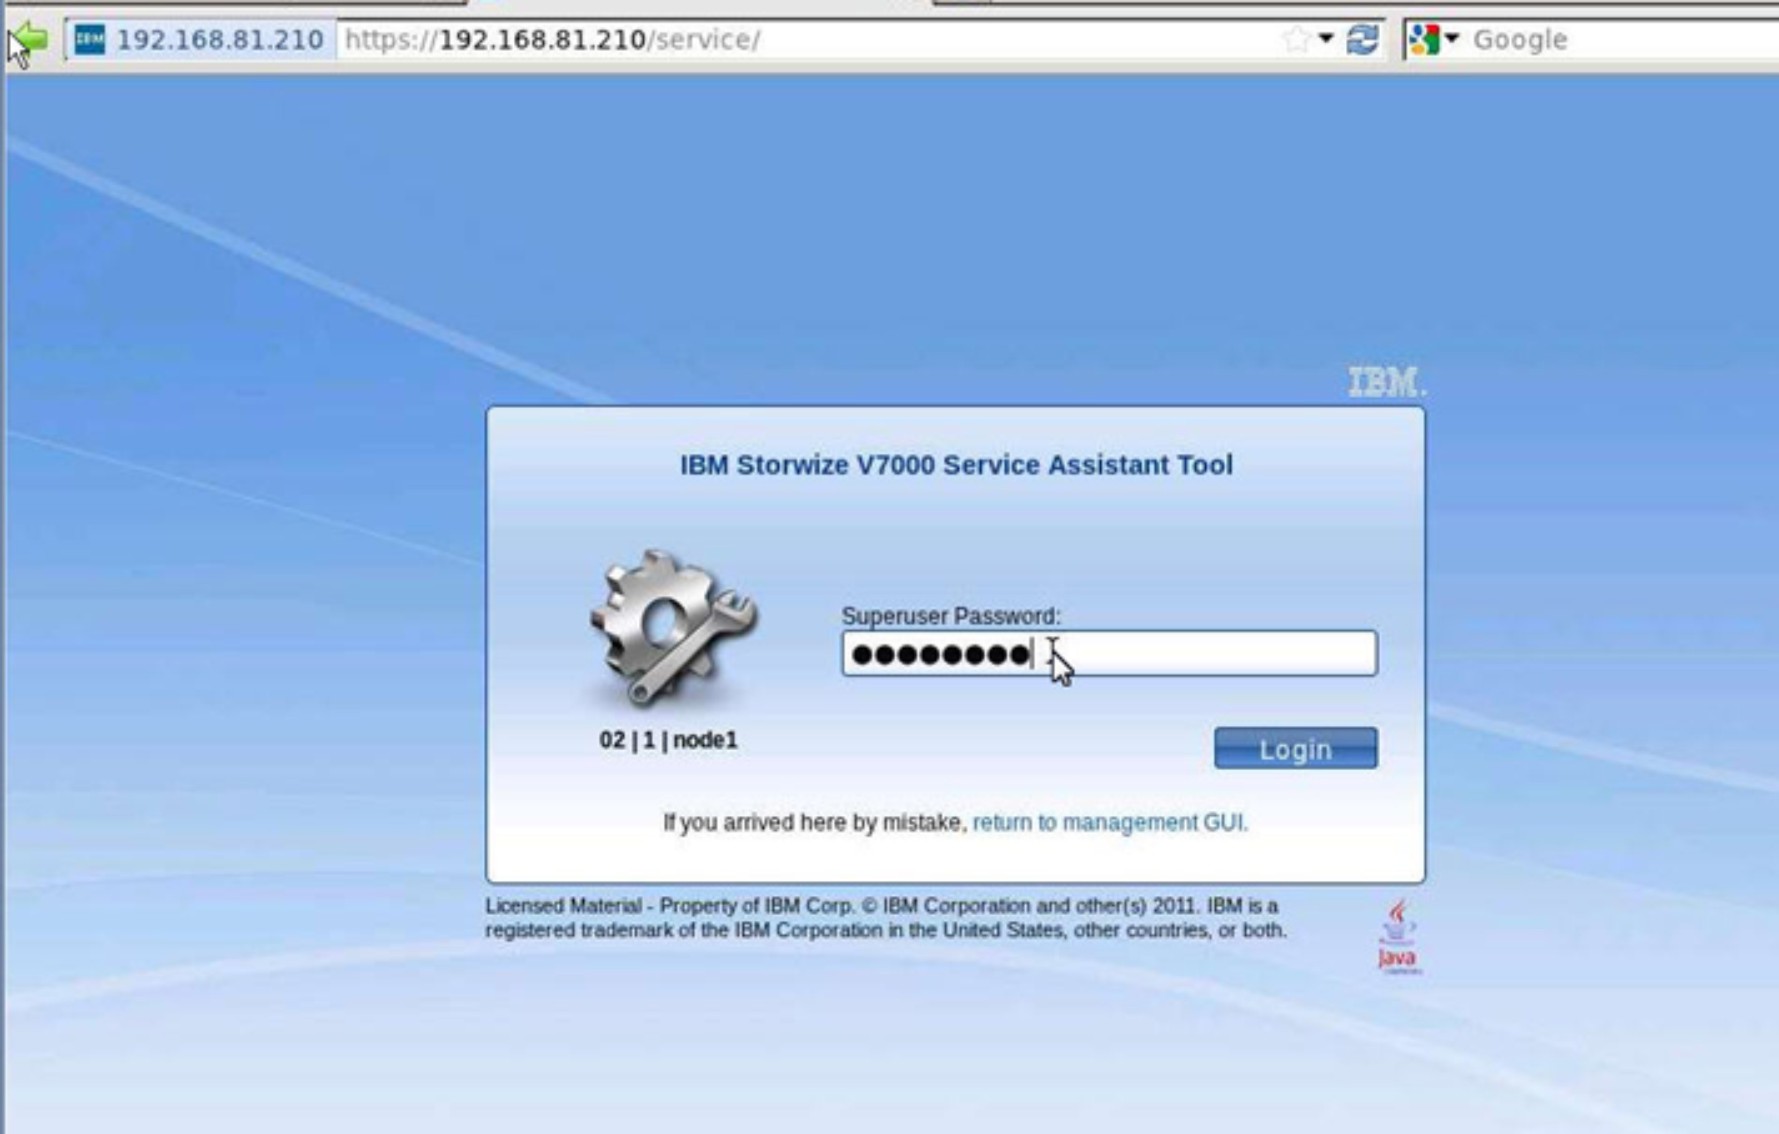 Figure 2. Storwize V7000 Service Assistant Tool sign-in window
 - Ensure that there are no errors reported in
the Error field.Note: If you identify a component that is in the Error state, contact your service provider.
- If you have a second Storwize V7000, type 192.168.93.217/service in a different browser window. Complete steps 2.c and 2.d for this second Storwize V7000.
- You may now disconnect the device from the upper controller port.