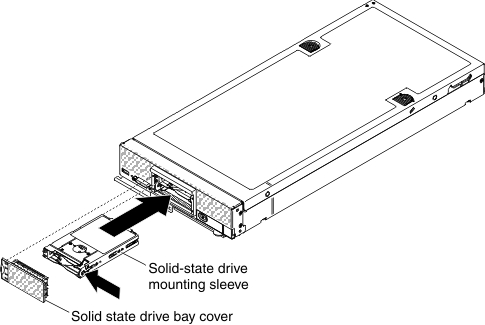
Use this information to install an optional solid state
drive mounting sleeve.
The solid state drive mounting sleeve is required
to install optional 1.8-inch hot-swap solid-state drives (SSDs). Each
mounting sleeve can hold up to two 1.8-inch hot-swap SSDs. When solid
state drive mounting sleeves are used, two sleeves are installed in
the compute node.
Before you install a hot-swap hard disk drive,
read Safety and Installation guidelines.
To install a solid state drive mounting sleeve, complete
the following steps.
Important: Installation of a solid
state drive mounting sleeve requires installation of a compatible
solid-state drive backplane, bezel, and solid state drive bay cover.
-
Remove the compute node cover (see Removing the compute node cover).
-
Identify the hard disk drive bay in which you plan to install
the solid state drive mounting sleeve.
Important: If you are installing a hard
disk drive backplane that uses a solid state drive mounting sleeve,
install the backplane before you install the mounting sleeve (see
Installing a hard disk drive backplane).
-
Touch the static-protective package that contains the solid
state drive mounting sleeve to any unpainted metal surface
on the Lenovo Flex System chassis
or any unpainted metal surface on any other grounded rack component;
then, remove the solid state drive mounting sleeve from the package.
-
Orient the solid state drive mounting sleeve so that the
status LEDs are toward the left.
-
Slide the solid state drive mounting sleeve into the bay
until it is firmly seated in the connector.
-
Install any SSD disk drives (see Installing a 1.8-inch solid state drive).
-
Install the solid state drive bay cover.