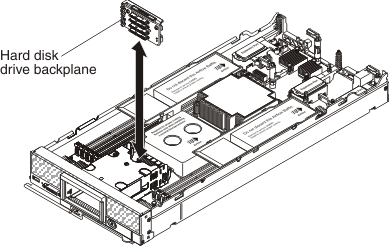
Use this information to install a hard disk drive backplane.
Before you install a hard disk drive backplane, complete the
following steps:
- Read Safety and Installation guidelines.
- If the compute node is installed in a chassis, remove it (see Removing a compute node from a chassis for instructions).
- Carefully lay the compute node on a flat, static-protective surface, orienting the compute node with the bezel pointing toward you.
Note:
- Several different types of hard disk drive backplane can be installed in the compute node: all are removed and installed in a similar manner. The hard disk drive backplane shown in the illustrations might differ slightly from the backplane installed in your compute node.
- See the documentation that comes with an optional hard disk drive backplane for device-specific information and information about installing other components that might be included as part of the option or about other components or modules that must be installed to use the option. For example, some optional hard disk drive backplanes might require installation of a second microprocessor.
To install a hard disk drive backplane, complete the following steps.
After you install the hard disk drive backplane, complete
the following steps:
- Install the cover onto the compute node (see Installing the compute node cover for instructions).
- Install the compute node into the chassis (see Installing a compute node in a chassis for instructions).