Use these instructions to remove the control panel assembly from the storage expansion node.
Before you remove the control panel assembly, complete the following steps:
- Read Safety and Installation guidelines.
- If the storage expansion node assembly is installed in an Flex System Enterprise Chassis, remove it (see Removing the storage expansion node assembly from the Flex System Enterprise Chassis for instructions).
- Carefully lay the storage expansion node assembly
on a flat, static-protective surface.Attention: Make sure that the drive drawer is supported when it is open. The weight of installed drives can cause the storage expansion node assembly to be unstable when the drive drawer is open.
- Open the drive drawer approximately 20 cm (8 in.).
To remove the control panel assembly, complete the following steps.
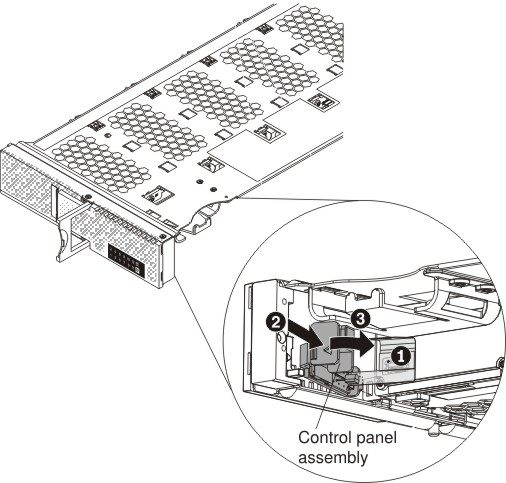
- Disconnect the control panel assembly cable from the connector on the drive drawer.
- Press the tab on the outer edge of the control panel assembly to release the assembly from the inside of the bezel.
If you are instructed to return the control panel assembly, follow all packaging instructions, and use any packaging materials for shipping that are supplied to you.
Continue to Replacing the control panel assembly.