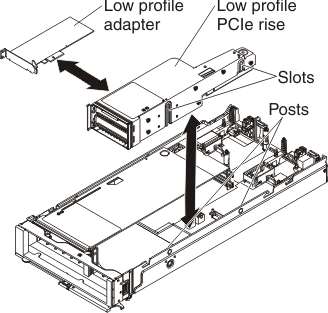
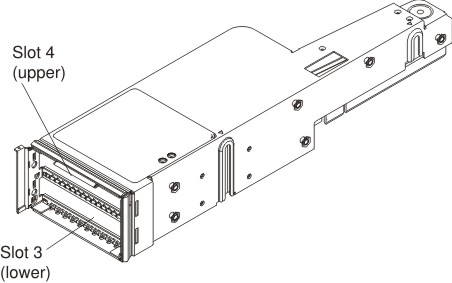
Use this information to install an adapter in the PCIe Expansion Node low-profile PCIe riser.
Before installing a low-profile adapter, complete the following
steps:
- Read Safety and Installation guidelines.
- If the PCIe Expansion Node is installed in a Flex System Enterprise Chassis, remove it (see Removing a PCIe Expansion Node and attached compute node host for instructions).
- Remove the PCIe Expansion Node cover, if one is installed (see Removing the cover).
Statement 21![]()
CAUTION:
Hazardous energy is present
when the blade is connected to the power source. Always replace the
blade cover before installing the blade.
To install an adapter in the PCIe Expansion Node low-profile PCIe riser, complete the following steps:
After installing a low-profile adapter, complete the following
steps:
- Install additional PCIe adapters or I/O expansion adapters as
needed:
- To install a full-height adapter, see Installing a full-height adapter
- To install an I/O expansion adapter, see Installing an I/O expansion adapter
- Close the PCIe Expansion Node cover and install the assembly in the Flex System Enterprise Chassis (see Completing the installation for instructions).

