Use these instructions to remove the compute node from the storage expansion node assembly.
Before you remove the compute node from the storage expansion node assembly, complete the following steps:
- Read Safety and Installation guidelines.
- If the storage expansion node assembly is installed in an Flex System Enterprise Chassis, remove it (see Removing the storage expansion node assembly from the Flex System Enterprise Chassis for instructions).
- Carefully lay the storage expansion node assembly on a flat, static-protective surface with the storage expansion node and compute node bezels facing you.
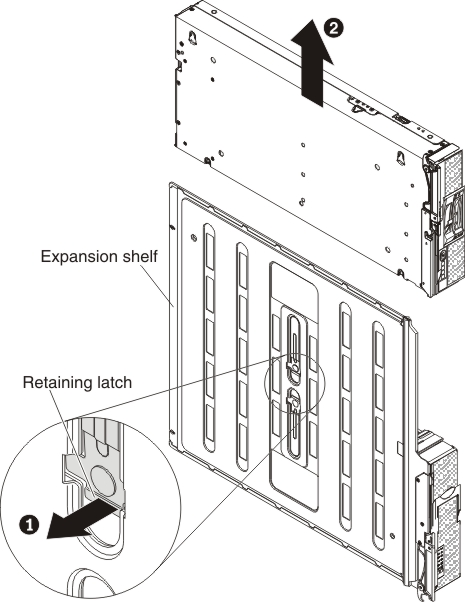
To remove the compute node, complete the following steps:
- On the underside of the expansion shelf, lift the raised
edge of the retaining latch that secures the compute node to the shelf
while you slide the compute node away from the center of the shelf,
as shown in the following illustration.