Use these instructions to remove the storage expansion node assembly from the Flex System Enterprise Chassis.
Before you remove the storage expansion node assembly,
complete the following steps:
- Read Safety and Installation guidelines.
- If the compute node in the storage expansion node assembly is operating, shut down the operating system, and press the power button to turn off the compute node (see the compute node Installation and Service Guide for more information).
Statement 4

 |
 |
 |
| ≥ 18 kg (39.7 lb) | ≥ 32 kg (70.5 lb) | ≥ 55 kg (121.2 lb) |
CAUTION:
Use safe practices when lifting.
To remove the storage expansion node assembly from the Flex System Enterprise Chassis, complete the following steps.
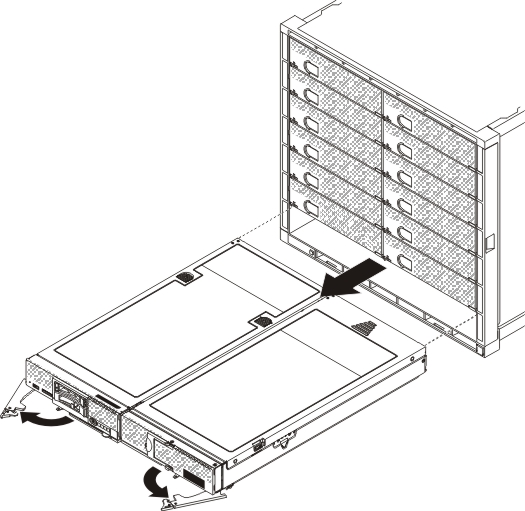
Attention: Make sure that the drive drawer is closed and latched. Do not attempt to remove the storage expansion node assembly from the chassis while the drive drawer is open.