Use these instructions to install a PCIe Expansion Node with a compute node host in an Flex System Enterprise Chassis.
Before installing a PCIe Expansion Node with
compute node host in an Flex System Enterprise Chassis,
complete the following steps:
- Read Safety and Installation guidelines.
- Remove the 1-bay shelf from the Flex System Enterprise Chassis bays where the PCIe Expansion Node will be installed (see Removing a 1-bay shelf for instructions).
Statement 4

 |
 |
 |
| ≥ 18 kg (39.7 lb) | ≥ 32 kg (70.5 lb) | ≥ 55 kg (121.2 lb) |
CAUTION:
Use safe practices when lifting.
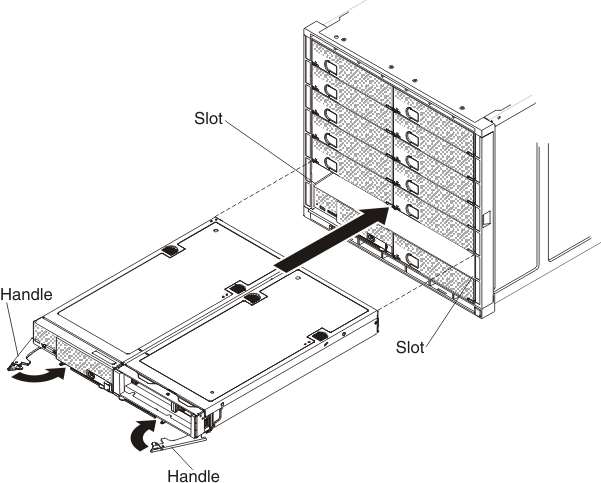
To install a PCIe Expansion Node with compute node host, complete the following steps:
- Orient the 2-bay shelf assembly containing the compute
node and the PCIe Expansion Node with
the front of the assembly pointing toward you.
If you have changed the configuration of the compute node or if you are installing a different compute node from the one that you removed, you must configure the compute node through the Setup utility, and you might have to install the compute node operating system. See Updating the compute node configuration for more information.