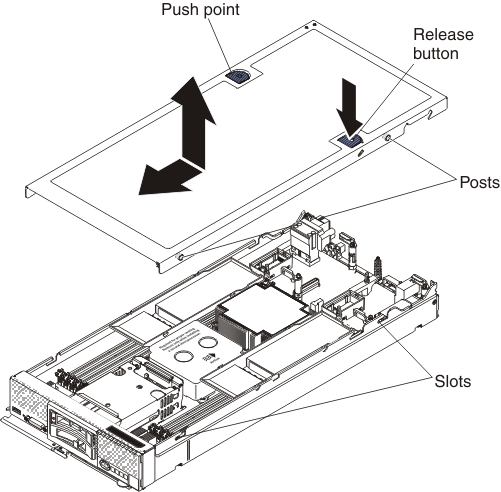
Use this information to install the compute node cover.
Before you install the compute node cover, read Safety and Installation guidelines.
If you are replacing the cover, make sure that you have the system service label kit on hand for use during the replacement procedure (see Parts listing, Types 7162 and 2588).
Attention: You
cannot insert the compute node into the Flex System chassis
until the cover is installed and closed. Do not attempt to override
this protection.
Statement 21![]()
CAUTION:
Hazardous
energy is present when the compute node is connected to the power
source. Always replace the compute node cover before installing the
compute node.
To install the compute node cover, complete the following steps:
After you install the compute node cover, install the compute
node into the chassis (see Installing a compute node in a chassis for
instructions).
