Use these instructions to attach a replacement storage expansion node to the expansion shelf.
Before you begin
Before you attach the storage expansion node to the expansion shelf, complete the following steps:
- Read Safety and Installation guidelines.
- Lay the expansion shelf on a flat, static-protective surface with the black edge facing you.
- If a compute node is attached to the shelf, remove the compute node cover, if you have not already done so (see the compute node Installation and Service Guide for instructions).
Procedure
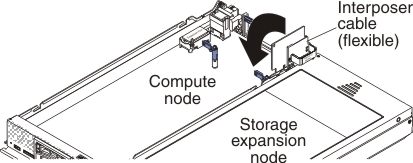
Attention: If a compute
node is attached to the shelf, bend the interposer cable up and over
the storage expansion node to
ensure that the cable and connector are clear of the compute node.
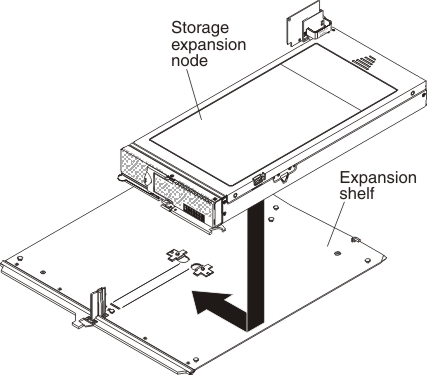
With the left edge of the storage expansion node aligned with the expansion node alignment mark on the expansion shelf, orient the slots on the bottom of the storage expansion node with the posts on the right side of the expansion shelf. Then, slide the storage expansion node toward the center of the shelf until the retention latch clicks into place, as shown in the following illustration.
What to do next
Complete the following steps:
- If a compute node is attached to the expansion shelf, complete
the following steps:
- If any I/O expansion adapters in the compute node are blocking access to the interposer connector, remove them (see the compute node Installation and Service Guide for instructions).
- Connect the interposer cable to the interposer connector on the
compute node system board, as shown in the following illustration.
- If you removed any I/O expansion adapters from the compute node, install them (see the compute node Installation and Service Guide for instructions).
- Install the compute node cover (see the compute node Installation and Service Guide for instructions).
- Install a flash/RAID adapter and flash power module, if necessary (see Installing a flash/RAID adapter and flash power module for instructions).
- Install the storage expansion node assembly into the chassis (see Installing the storage expansion node in an Flex System Enterprise Chassis for instructions).
- Install drives in the storage expansion node (see Installing a hot-swap drive for instructions).