Removing a 1.8-inch solid state drive

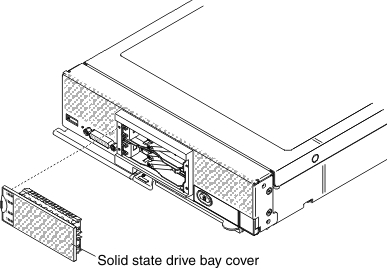
Use this information to remove a 1.8-inch hot-swap solid state drive (SSD). Solid state drives can be installed in the compute node, only if an SSD enablement kit is installed.

Before you remove a hot-swap solid state drive, complete the following steps:

  1. Back up all important data before you make changes to solid state drives.
  2. Read Safety and Installation guidelines.

To remove a hot-swap solid state drive, complete the following steps:


Removing a solid state drive bay cover

  1. Remove the solid state drive bay cover.
    Removing a solid state drive
  2. For the solid state drive that you want to remove, slide the release latch and rotate the loose end of the drive tray handle away from the compute node.
  3. Pull forward on the drive tray handle to disengage the solid state drive; then, slide the solid state drive out of the drive bay.
    Note: When you remove a drive from the compute node, consider labeling the drive to indicate the drive bay from which the drive was removed so that you can install the drive back in to the same drive bay.
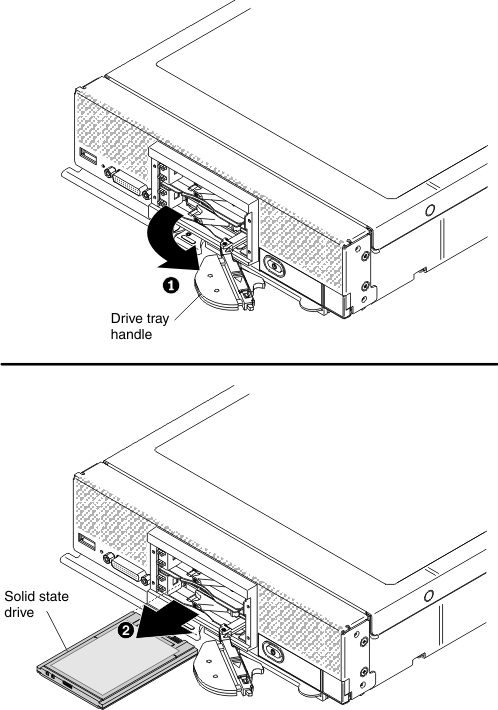
  4. Close the drive tray handle and secure it with the latch.
    Note: You might have to press the latch before you close the drive tray handle.

    Installing a solid state drive bay cover
  5. Orient the solid state drive bay cover so that the LED label is toward the left.
  6. Press the solid state drive bay cover into the front of the compute node until it is firmly seated.
If you are instructed to return the solid state drive, follow all packaging instructions, and use any packaging materials for shipping that are supplied to you.