Use these instructions to remove and replace the dust filters in the airborne contaminant filter assembly and 1U filter retainer. You can replace the dust filters while the chassis is powered on.
The airborne contaminant filters are a consumable part. It
is not covered under the terms of the warranty. Use Table 1 as
a guide to help you determine when to replace the filter media in
the filter assembly.
| Environment | Visually inspect and clean | Replace filter |
|---|---|---|
| Low dust, low foot traffic | 3 months | 6 months |
| Moderate dust, moderate foot traffic | 6 weeks | 3 months |
| Heavy dust, heavy foot traffic | 2 weeks | 1 month |
Note: The Chassis Management Module web
interface supports an air filter reminder that sends an event message
to the CMM event
log when the filter media needs to be replaced. See ../com.lenovo.acc.cmm.doc/cmm_ui_setting_airfilter_reminder.html for more information.
Both the 10U and 1U filters are made of a premium quality flame-retardant reticulated filter foam. The filters meet the Underwriters Laboratories Inc. flame class of UL94 HF-1 (UL file number E93229). This filter foam also meets the European RoHS standard.
| Color: Black | Base material: Polyether, polyester blend |
| Density (approximate): 2 - 3.2 lbs/ft3 | Tensile strength, minimum: 22 psi |
| Tear strength, minimum: 4.5 lbs/inch | Elongation, minimum % to break: 200 |
| Cell count: 10 - 100 ppi | Reticulation: Thermal (zapped) |
| Thickness range: 0.15 - 1.0 inches | Flammability rating: UL94, HF-1 |
| Temperature range: -40°F to +284°F | Dust filter replacement pack part number 43W9057 (includes four 10U filters and four 1U filters) |
Attention: Do not clean and reuse the dust filters.
You must discard contaminated filters and replace with new filters.
Complete the following steps to replace the airborne contaminant filter media:
- Replace the 10U dust filter in the airborne contaminant
filter assembly.
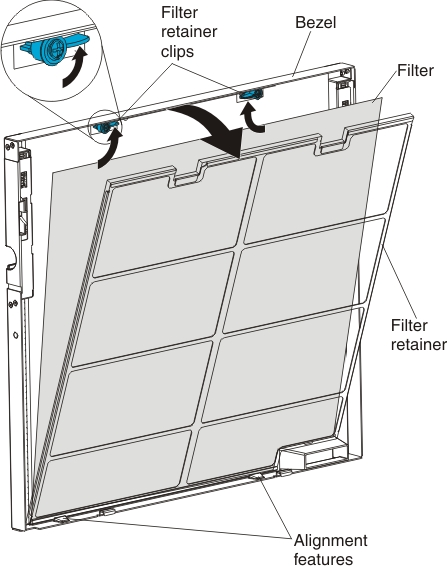
- Turn the blue filter retainer clips to the open position
and remove the filter retainer and filter.
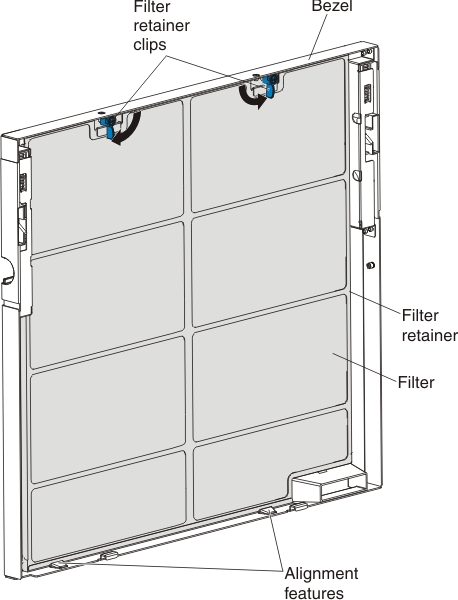
- Rotate the filter retainer onto the filter and close
the blue filter retainer clips by rotating them down to secure the
filter retainer to the filter assembly bezel.
- Turn the blue filter retainer clips to the open position
and remove the filter retainer and filter.
- Replace the 1U dust filter located behind the 1U bezel.
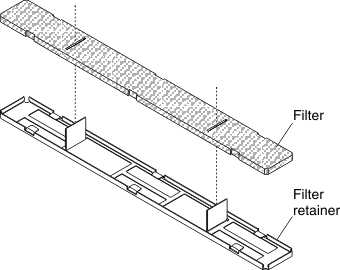
- Place the 1U filter retainer on a flat surface with
the extensions up. Place a new filter over the retainer extensions
and slide it down into the retainer. Bend the filter slightly and
tuck the filter edges under the tabs on the filter retainer; then,
press the filter edges all the way into the retainer.